September 21, 2015

Simple pleasures

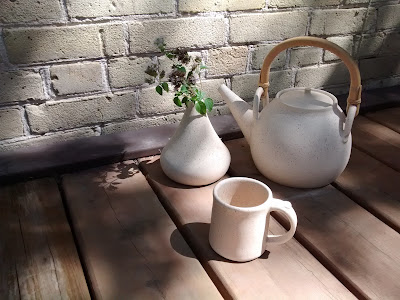
I enjoy the company of pots & plants.

Much like myself, the plant on the left, Sedum Morganianum is happiest on warm, dry, sunny days.

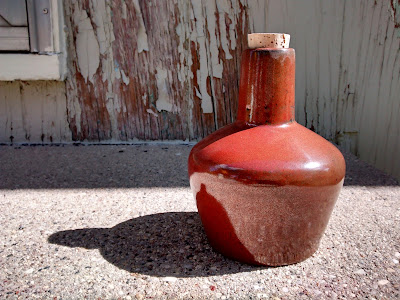
These two pieces were thrown on the wheel, using a dark, lowfire claybody. They were later altered using various techniques. The left was tapered and textured using a cheese grater. The right was burnished then decorated with slip and sgraffito.

What are your simple pleasures?

Image of clay plant pot with donkey tail growing and red clay bottle with sgraffito design

June 17, 2015

Kitchen Counter Compost

For too long, I've used an old yogurt pot for my kitchen counter compost bin. To that, I say, "No more!"

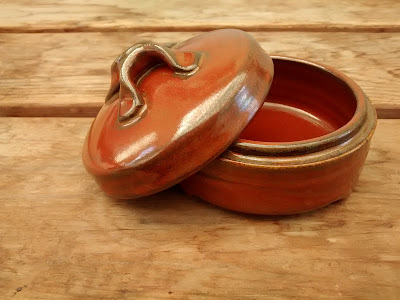
I made this beautiful ceramic container on the wheel out of a low fire red clay. It's adorned with two lug handles and a sturdy lid. I burnished the upper rim of the lid with the back of a spoon, drilled a hole in the lid's center, glazed the underside and fired it upside-down. The pot itself is glazed entirely, save for its underside. This means that all surfaces which will be in contact with food have been sealed with glaze, to prevent unwanted bacteria from growing inside the porous clay. The white handle is a ceramic cabinet fixture. It's basically a decorative bolt with a nut to fasten it.

I have a vermicular compost system outside on my balcony. Whatever goes into this kitchen counter compost eventually gets thrown to the worms, gobbled up and turned into beautiful castings for the garden.

I hope this inspires you to make something beautiful for your own home.


Image of a lidded red clay pot used for kitchen compost


January 31, 2015

Is it Food Safe?

Food safety is an important issue that all makers and buyers should be aware of.  

A ceramic piece's ability to leach harmful chemicals is based on the way all of its materials react when combined.  The clay body, the glaze recipe, and the firing temperature all play key roles in determining whether or not a piece is food safe. Combining food safe clay with food safe glaze does not ensure a food safe product.

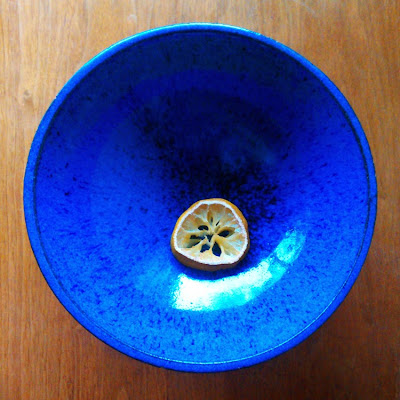
Acid test:  To test if a piece is susceptible to leaching, place a slice of lemon (or a puddle of vinegar) on the glazed surface.  Leave it there for a few days.  Remove it and look for changes in texture, colour, or sheen.  If the acid from the lemon (or vinegar) alters the glaze in any way, the item is not food safe.

Image of a blue ceramic bowl with a slice of lemon inside

January 26, 2015

Four Piece Pipe Mold

Using a mold is a great way to replicate a hollow form. In this post, I will show you how to make a plaster mold for casting multiple clay pipes.


September 20, 2013

Beautiful Buttons

These buttons are the perfect accessory for handmade articles.
Each one is individually hand crafted, using recycled clay.


Image of handmade clay buttons

Image of handmade clay buttons

Handmade at Home

I left Winnipeg, moved to Saskatoon and became a mom.  I still work with clay, only in a different way.  Now my work is handbuilt at the kitchen table.  Here is some recent work.


June 1, 2012

Wiika Cup

This commission was a challenge.  It took 20 hours and 4 separate firings.  The order was for a pair of all black, all purpose, double walled mugs.  They were designed to have a 2mm wide thermal break between the inner and outer walls.  The dimensions of the cups were specific, to the millimeter.


I started by throwing the base and hand-building two separate walls (inner and outer).


Balloons were inserted during the initial sculpting and drying process, to ensure that the forms be as close to cylindrical as possible.


Miscalculating the shrinkage and drying rate of the clay, I ended up with an extra large, cracked version of Litovitch's design.  It went to recycling and I was back to square one.

Attempt number 2 involved the making and casting of a plaster mold.  The plan was to throw a master cast on the wheel, make plaster molds of them, then cast them using casting slip.  At least, that was the plan... The masters were handthrown and the slightest undercuts caused the inner volume of the mold to break off.  Fortunately, what remained of the mold was still useful.


The clay casts were removed from the plaster forms, hand assembled and carved, dried, bisqued, covered in sikora black cone 6 glaze, and fired.  After the first glaze fire, one of the cups had a very small patch in the inner volume that had resisted the glaze. This required me to dab some extra glaze over the bare spot and refire to cone 6.  I refired the pair of them because a second firing often changes the appearance of glaze and I wanted to make sure both cups would have the same finish.


R. Litovitch has requested that these all-purpose cups be named "wiika" cups (pronounced wee-kah). The name is inspired by the aboriginal name for the Calamus Root, Ryan's favourite root.

Thank you Ryan for this original design!

Related Posts Plugin for WordPress, Blogger...